What is a hotspot server? The hotspot feature provided by MikroTik may not be the one in your mind, it is much more powerful than what most of us expected before we learn about it.
Let’s read about the description from MikroTik Wiki.
The MikroTik HotSpot Gateway provides authentication for clients before access to public networks .
HotSpot Gateway features:
different authentication methods of clients using local client database on the router, or remote RADIUS server;
users accounting in local database on the router, or on remote RADIUS server;
walled-garden system, access to some web pages without authorization;
login page modification, where you can put information about the company;
automatic and transparent change any IP address of a client to a valid address;
Another description from MikroTik website.
HotSpot Gateway
Enables easy user authentication and accounting in public, private, wired or wireless networks. HotSpot technology allows Internet providers to offer Internet access to customers, while applying certain Internet use rules and limitations. It is very convenient for Internet cafes, hotels, airports, schools and universities. The Internet provider gets a complete real-time accounting of each customer’s time spent on the network, data amount sent, received and more.
User accounting by time, data transferred/received
Bandwidth shaping
Quota (session-timeout, downloaded/uploaded traffic limit)
DHCP server assigned IP addresses
Radius Accounting
Real-time user status information
User Management System
MikroTik provides complete solution for hotel hotspot/pppoe user management.
Printing out HotSpot user vouchers
Accounting the usage time since the first log in
Suited for any small or medium size hotel
Real-time user status information
Basically, you can create a complete commercial hotspot network with any MikroTik router or RouterOS device.
Today we are not going to touch all the features mentioned above, we will just try to build a very basic hotspot server in this guide, then you can build your customized hotspot server from there.
First of all, you need a MikroTik router (any model other than RB250GS) with license at least Level 4 and get it connected to the Internet, otherwise your hotspot network may not work as expected.
Run WinBox.
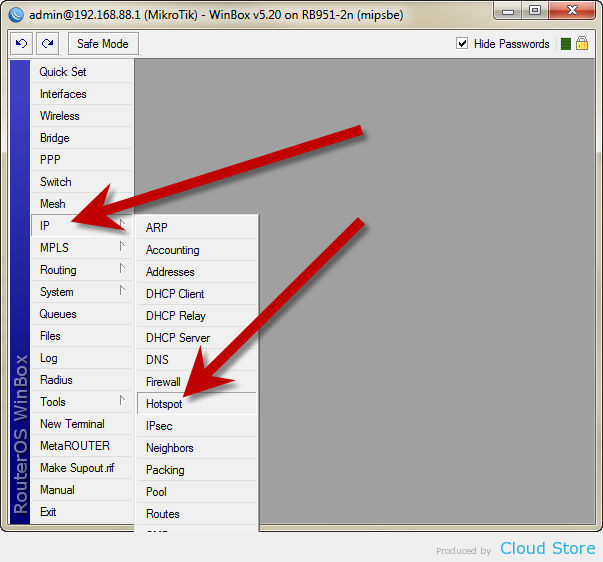
Click “IP” on the menu and then “Hotspot” on the sub-menu.
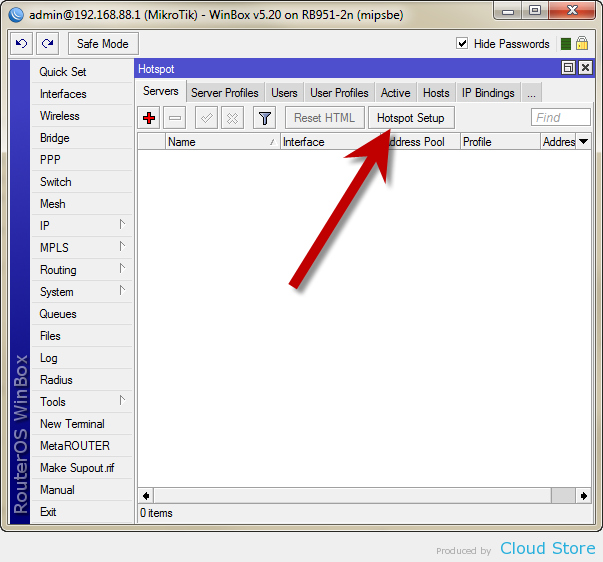
Press “Hotspot Setup”.
Select the interface which you want the hotspot server to run on. In this guide, we run it on our wireless network (wlan1), you can select any Ethernet interface, bridge and others in the list.

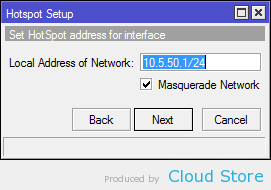
Next, this is the IP address to be assigned to your hotspot server.
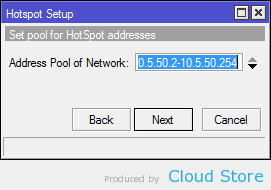
Next, this is the IP range to be assigned to your hotspot network clients.
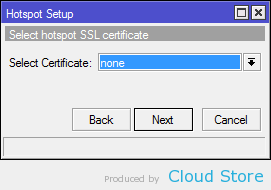
Next, leave it as none and continue.
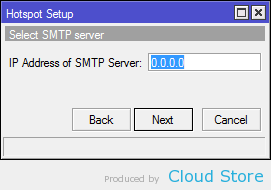
Next, leave it as default again and continue.
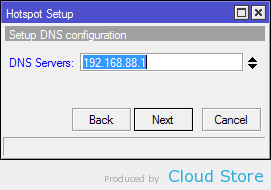
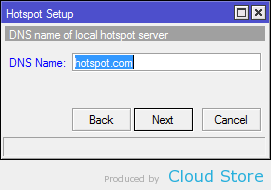
Next, fill in your router IP for DNS queries.
Next, fill in your hostname of the hotspot login page. You can put any domain name here but remember that it will be turned into your login page.
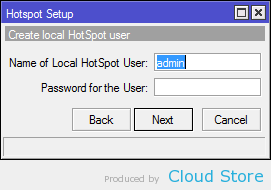
Next, create the very first user account that allows to login to this hotspot network.
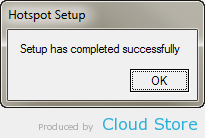
The hotspot server is created successfully now.
Now you can connect your computer or smartphone to the interface with your hotspot server to try it. In this case, it’s the wireless network.
To add more users to the hotspot server, click “Users” on top.
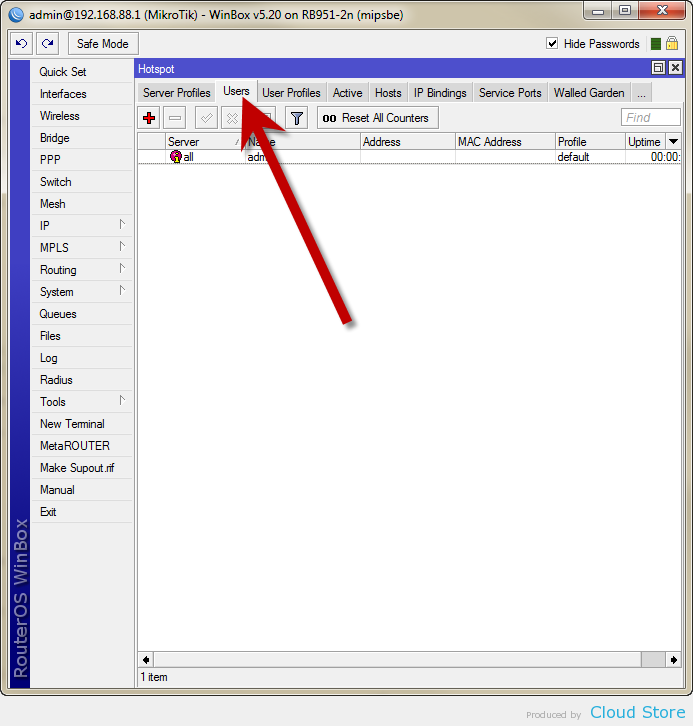
Press the plus button.
Fill the username and password which you are going to give out to your users to login to the hotspot server.
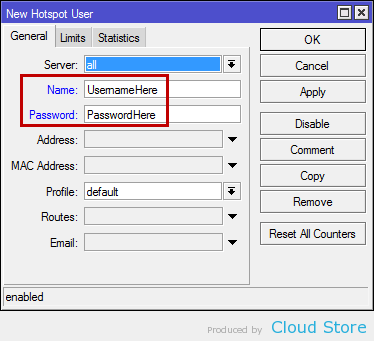
Press “OK” and the account is ready for use now.
If you are not satisfied with this basic hotspot server, you can learn more about it at MikroTik Wiki
Source taken from Cloudstore
You can pm us for solutions using mikrotik hotspot with external cloud radius server with prepaid billing system at [email protected]